
This post will show you how to deploy the Printix client using NinjaOne Documentation fields and a PowerShell script.
Creating Fields
Creating custom fields in NinjaOne
To create a custom field in NinjaOne go to Administration > Devices and select either Role Custom Fields or Global Custom Fields then select Add.
When you create your custom field you need to make sure that you set the Scripts permission to ensure that you can read or write to the field from your scripts - as appropriate for the script you're using.
- Role Custom Fields are custom fields that are specific to a device role.
- Global Custom Fields are custom fields that are applicable to all devices and/or to a location and/or organisation
When you create your custom field you need to make sure that you set the Scripts permission to ensure that you can read or write to the field from your scripts - as appropriate for the script you're using.
We're adding two documentation fields to facilitate this script. You'll need to note your document template id, in the screenshots / our internal use we have a template called "Integration Identifiers" which we use to store any integration identifiers we need to reference in our scripts.
| Field Label | Field Name | Field Type | Description |
|---|---|---|---|
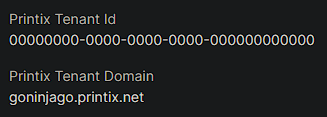
| Printix Tenant Id | printixTenantId | Text | Holds the customer's Printix tenant id. |
| Printix Tenant Domain | printixTenantDomain | Text | Holds the customer's Printix domain. |
The Script
Install-PrintixClient.ps1
loading...
Parameters
When you run this script you need to pass your document template id. For example, sticking with our example above, you'd run the script with the parameter: -DocumentTemplate Integration Identifiers
The Results

We run this script on a group of devices which don't have the Printix client installed.